Advanced Reactions
Reactions allow us to either do something simple as a reaction to a real-life event, or completely change the strategy and direction of any claim’s trajectory. That is, using reactions, the platform will react to events in real-time with customizable pre-designated replies or responses.
While Reactions are completed by only adding an event and a reaction, Advanced Reactions require additional steps:
- Create a content - The content defines what type of response will be sent to the client. It could be an email, SMS, letter, or a robocall.
- Add a step in the strategy - You need to add a step in the strategy so an action can take place later on in the Landing page. This action will later on trigger a reaction.
- Modify the Landing Page content - The content in the Landing Page defines how the client can access the reaction that would trigger the response. It could be through buttons, HTML, QR Code, or Payment.
- Set up the reaction - This contains selecting an event and a reaction to that event.
Use case: Sending a thank you email
One of the reactions you don’t want to miss out on is sending a “Thank You” email to your clients when they make a successful payment. Because Advanced Reactions require the additional steps outlined above, take a look at how this is applied when sending a Thank You:
- Create an email content
- Add the step Payment Providers to our strategy
- Add the Payment content block in the Payment Landing Page
- When (event) landing page payment succeeded, then (the reaction) send debtor email, in this case, a Thank You email.
Remember that different use cases may require you to alter these steps, but you can use this example as a guide. Let’s take a look at how to do each step.
Step 1. Create content (an email)
The first step to create an Advanced Reaction is to create content in the form of an email, SMS, letter, or robocall. In our Sending a Thank You Email example, we use email as the type of content that we will send to our client when their payment goes through successfully.
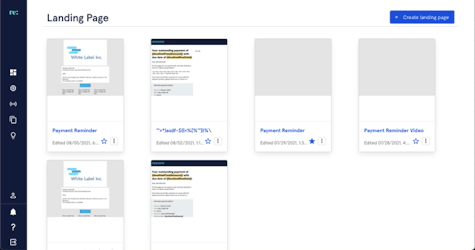
The template of the email to be sent to the client must be first built through the Email Builder. To start, go to Content and click Email Builder.
Create email
Click Create Email, select a template or build from scratch, and fill out the fields required. Once done, click Save.
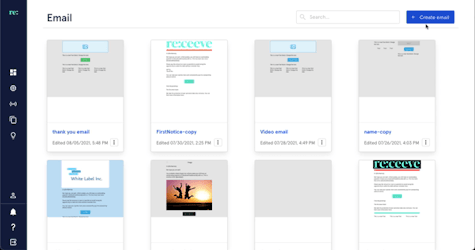
Remember that other content like SMS, Letter, or Robocall can be used when creating content for Advanced Reactions. More detailed information about building emails can be found here.
Step 2. Add a step in your Strategy (Payment Providers)
The next step in creating an Advanced Reaction is to add the step into your strategy. In our Sending a Thank You Email example, we are going to add the Payment Providers step so it can be executed later on.
To do this, go to Strategy and click Strategy Builder.
In the relevant strategy, drag and drop the Payment Providers step from the step library into the strategy. Then, select the payment provider/providers you'd like to use. 'Click Continue' to confirm the changes.
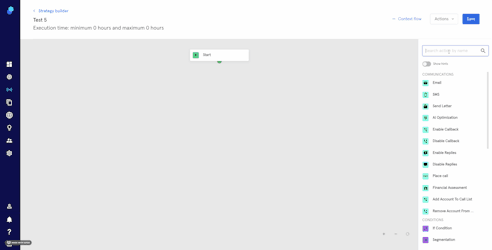
While this is the case for sending a thank you email, other use cases may require different steps to be added to the Strategy Builder. Click here for additional information.
Step 3. Update Landing Page
The next step in creating an Advanced Reaction is to update the Landing Page. While we can also use buttons, HTML, or QR code for other use cases, in our Sending a Thank You Email, we will add a Payment section in the Landing page.
To begin, go to Content and click Landing Page Builder.

Select the Landing Page and add the Payment Content Block to the content. This becomes the attribute that detects the ‘Payment Succeeded’ event in the following step.
More information is found on Landing Pages here.
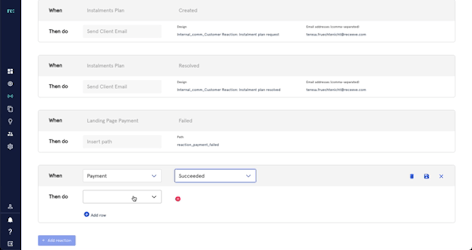
Step 4. Set up the reaction
Once you’re all done with the additional steps required for an Advanced Reaction, the final step is the same as adding a basic reaction.
To do this, we need to go to Strategy and in the sub-menu, click Reactions.
Select an event
Scroll down to the bottom of the page and click Add Reaction.
In our Sending a Thank You Email, we use Landing Page Payment as the trigger event in the When section. Then, we select Succeeded as the event status. Different events and statuses will be applicable to different use cases.
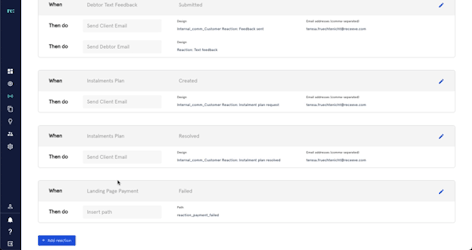
Define the reaction
Lastly, we need to define the reaction. In our Sending a Thank You Email, we select the Send Debtor Email reaction in the Then Do section. Then, we select the relevant email template.
Save
Once done with the setup, click the Save icon and you're done! The advanced reaction you just did can now respond real time to payments successfully made in the landing page by sending them a Thank You email.

Implementations
Apart from sending a Thank You email, other events can also be set up using the same steps outlined in Advanced Reactions. Some of these events are, but not limited to:
| When (Event) | Status |
| Payment is | canceled |
| failed | |
| successful | |
| started, but not completed | |
| SMS or email | clicked |
| opened | |
| bounced (or failed to receive) | |
| Support | call requested |
| Customer portal | visited |
| portal language changed | |
| Identity verification | failed |
| Instalment plan | promise to pay created |
| Automated journey | assigned |
| changed | |
| And more |