How to Setup YubiKey for SFTP Authentication
This page outlines setup instructions for YubiKeys. Note that this is part of a pilot. If you are an existing client wanting to join the pilot, please reach out to your Client Success Manager.
MacOS
Prerequisites
This guide is based on MacOS 11+
Before initializing your YubiKey for SFTP authentication, ensure the following applications are downloaded and installed:
A developer's tool for YubiKey command-line interactions
The recommended SFTP client for this setup
Key Generation
-
Install the YubiKey PIV Tool and Insert YubiKey: After installing, plug the YubiKey into your device.
-
Create a New Six-Digit PIN: Default is
123456. Change it using the Terminal:yubico-piv-tool -a change-pin -
Generate the SSH Key Pair: Replace
Writable Pathwith a directory on your device. The YubiKey will flash during this process, indicating normal operation:yubico-piv-tool -s 9a -a generate -o "Writable Path\public.pem" -
Create a Certificate from Key Pair: Replace
Writable Pathwith a directory on your device. The YubiKey will flash during this process, indicating normal operation:yubico-piv-tool -a verify-pin -a selfsign-certificate -s 9a -S "/CN=SSH key/" -i "Writable Path/public.pem" -o "Writable Path 2\cert.pem"When prompted, enter the PIN you set.
-
Import Certificate to YubiKey:
yubico-piv-tool -a import-certificate -s 9a -i cert.pem
Importing the Key for SFTP Authentication
-
Import Key for SFTP Authentication: Run the following command in Terminal:
ssh-add -s /usr/local/lib/libykcs11.dylibWhen prompted, enter your YubiKey PIN.
-
View Public Key: To display the public key:
ssh-keygen -D /usr/local/lib/libykcs11.dylib -eShare the second key block securely for SFTP authentication.
Filezilla Setup for YubiKey
Navigate to the Site Manager in Filezilla, select your site, and adjust settings:
- Remove any saved passwords.
- Set login type to 'Normal'.
- Enter SFTP username and URL.
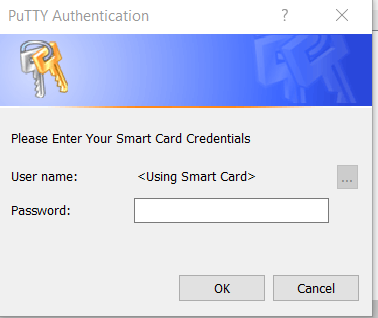
After updating settings, click 'Ok', reconnect to the site, and authenticate with your YubiKey PIN.
Troubleshooting
If you encounter authentication errors, clear and re-add your SSH keys:
ssh-add -D
pkill ssh-agent
ssh-add -s /usr/local/lib/libykcs11.dylib
Note: This will remove additional entries in the ssh-agent.
Windows
Prerequisites
This guide is applicable to 64-bit Windows architectures.
Before initializing your YubiKey for SFTP authentication, ensure the following applications are downloaded and installed:
A developer's tool for YubiKey command-line interactions
Enables Filezilla to support SFTP server logins via SSH keys
The recommended SFTP client for this setup
Key Generation
- Install the YubiKey PIV Tool and insert the YubiKey into your device.
- Set a new six-digit PIN for your YubiKey (default is 123456) with this command:
"C:\Program Files\Yubico\Yubico PIV Tool\bin\yubico-piv-tool.exe" -a change-pin
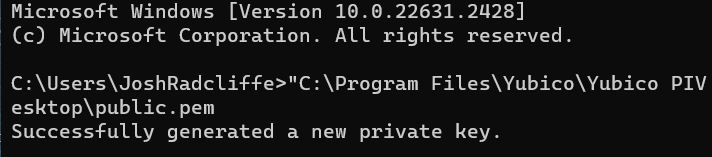
- Generate the SSH key pair with the command below. Replace “Writable Path” with a directory on your device. The YubiKey will flash during this process, indicating normal operation:
"C:\Program Files\Yubico\Yubico PIV Tool\bin\yubico-piv-tool.exe" -s 9a -a generate -o “Writable Path\public.pem”
Replacing “Writable Path” with a location on the machine that can be written to, the purpose of this command is to generate the SSH Key pair, both public and private, during this time the yubikey will flash, this is expected behaviour Below is a screenshot of the above command completing
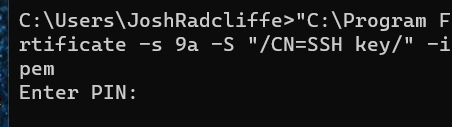
- Convert the generated key pair into a certificate format using:
"C:\Program Files\Yubico\Yubico PIV Tool\bin\yubico-piv-tool.exe" yubico-piv-tool -a verify-pin -a selfsign-certificate -s 9a -S "/CN=SSH key/" -i “Writable Path/public.pem” -o “Writable Path 2\cert.pem"
Replacing “Writable Path 2” with a location on the machine that can be written to and “Writable Path” with the path from the first command, this command, takes that private/public key and converts them to a certificate format for the use of the YubiKey.
This command will ask for a pin number, please enter the pin number that was created at the start of this guide:
- Import the certificate to your YubiKey:
"C:\Program Files\Yubico\Yubico PIV Tool\bin\yubico-piv-tool.exe" -a import-certificate -s 9a -i “Writable Path 2\cert.pem”
Replacing the writable Path 2 with the Writable Path 2 item from the previous command, this imports that newly created certificate to the YubiKey. 6. To retrieve the public key, open the ‘public.pem’ file in a text editor and securely share the contained public key. Please share this using a secured channel.
Importing the Key to be used with SFTP Authentication
After downloading Pageant.exe, move it to a preferred location and launch it.
In the system tray, right-click the Pageant icon and select “Remember Certs & Keys” for persistence across reboots.
Next, choose “View Keys & Certs,” and add the PKCS certificate by navigating to C:\Program Files\Yubico\Yubico PIV Tool\bin\libykcs11.dll. 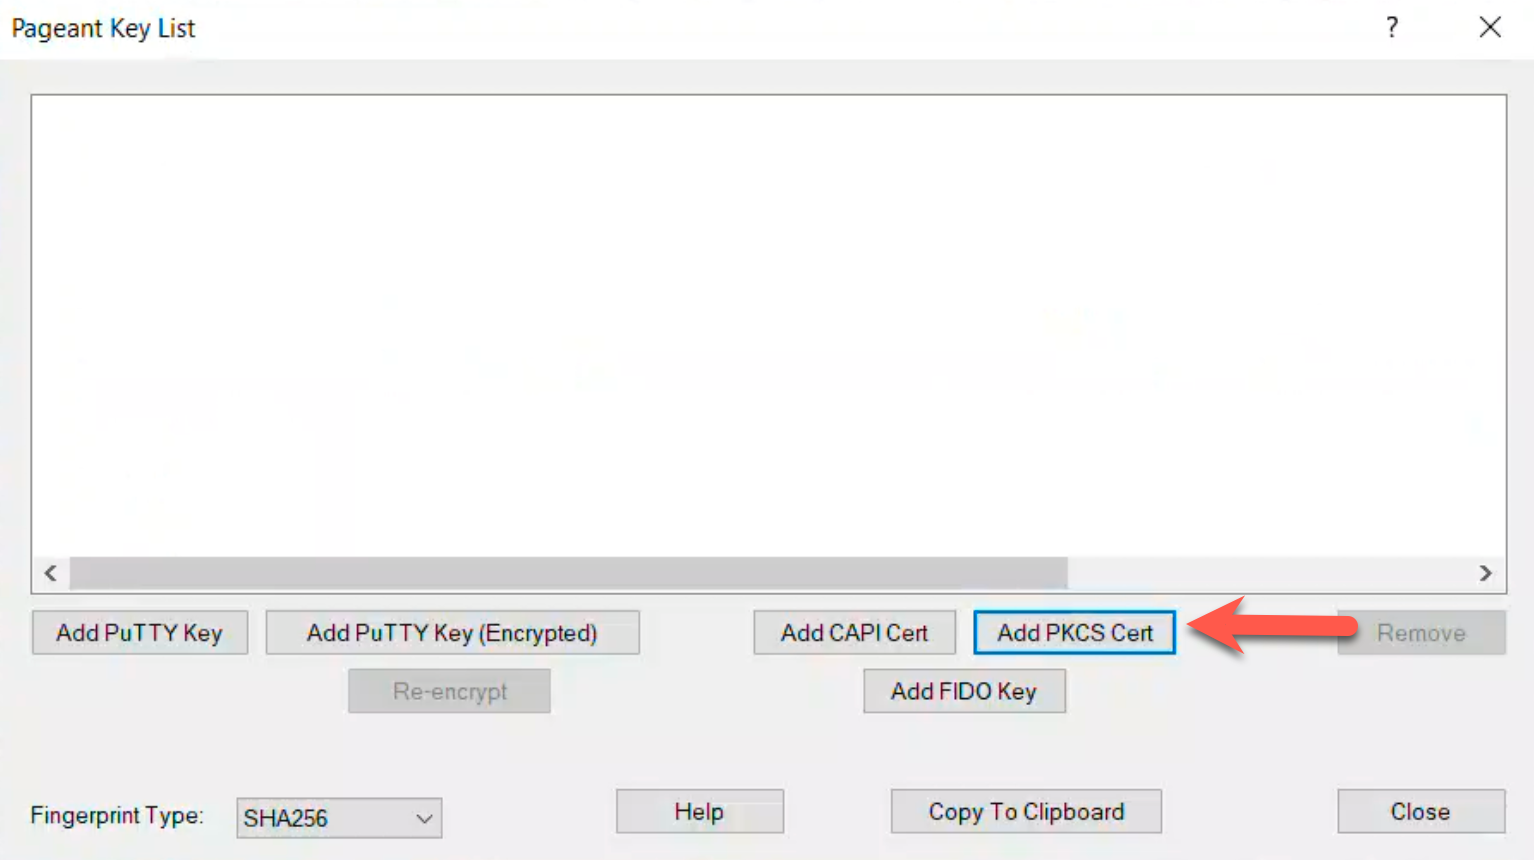
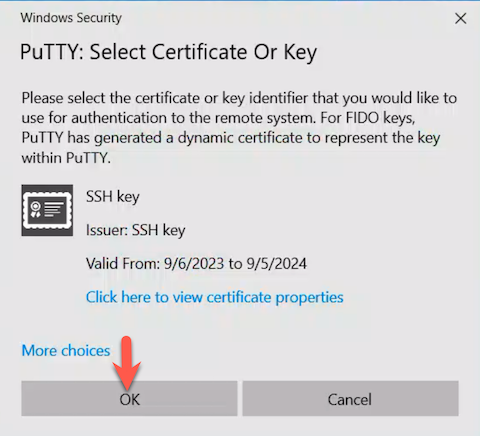
Confirm the certificate prompt to set up your YubiKey for authentication.
Filezilla Setup for YubiKey
In Filezilla’s Site Manager, select your site and update the settings:
- Clear any pre-saved passwords.
- Set login type to ‘Normal’.
- Enter your SFTP username and URL.
- Accept the changes, reconnect to the site, and when prompted, enter your YubiKey PIN to authenticate