Account Page - Options
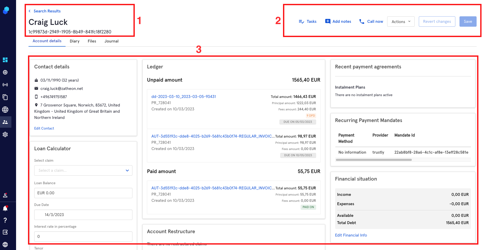
1. Account Details
In the Account details tab we'll find:
- Name of the customer and Debtor reference
- Buttons (Tasks, Add Notes, Call Now, Actions dropdown, Save)
- Widgets (Contact details, Ledger, Recent payment agreements, etc)
Actions Dropdown
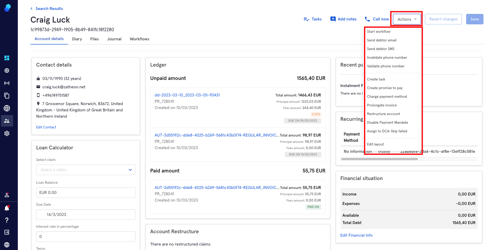
The Actions dropdown will allow you to perform different actions within an Account. Let's check them.
Start workflow
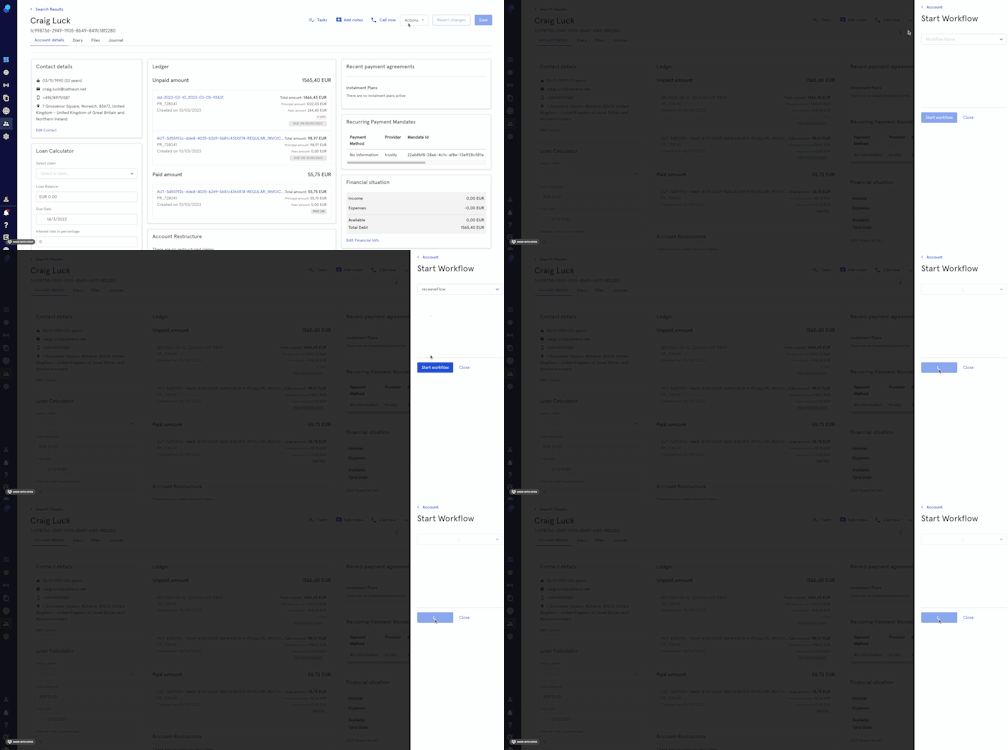
To perform this action:
- Select a workflow from the drop-down list.
- Click on start workflow.
To create a workflow, go to configuration > workflows and click on Create Workflow. Once created, the workflows will appear in the drop down as described in the previous paragraph. Please check this article on how to create a workflow.
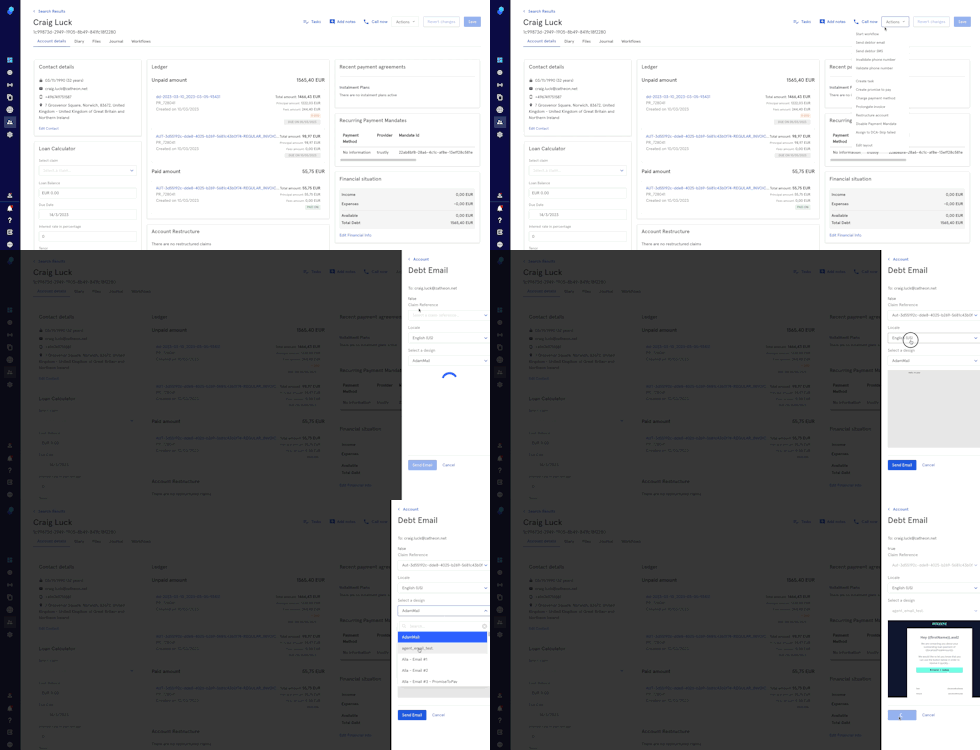
Send debtor email
- Select this action from the Actions dropdown
- Then, select claim reference
- Select Locale
- Select the design.
- Click Send Email.
Email - free text option
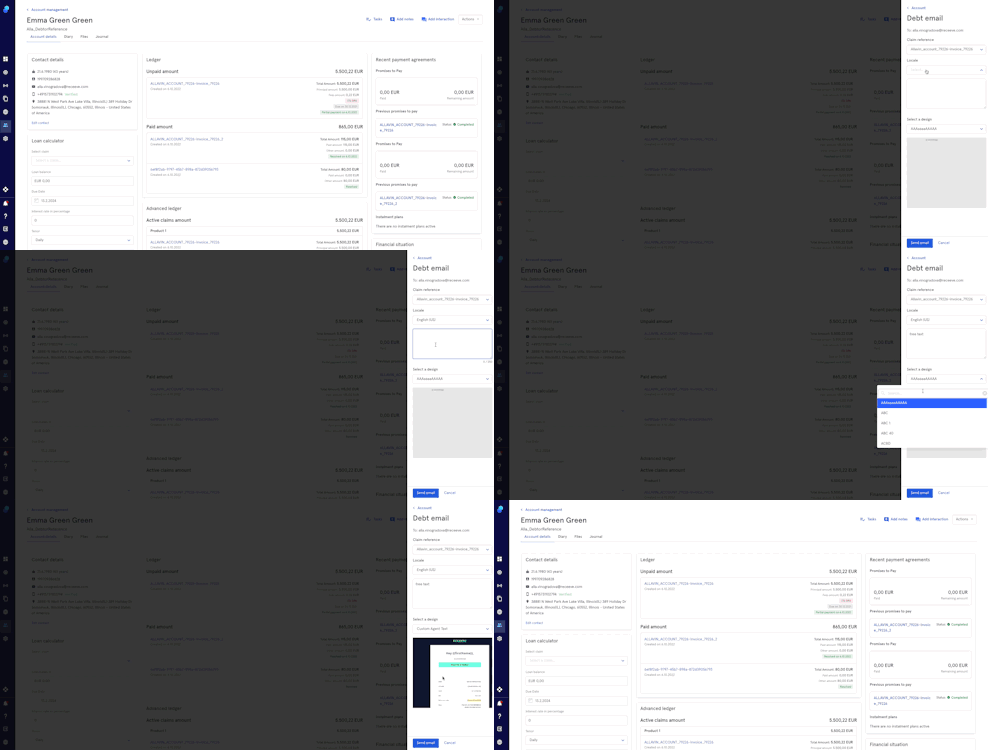
Think of this use case: an agent talks to a client over the phone and wants to send an email with a short email and a specific link. The agent writes this email in the free text box. This free text will replace a specific placeholder in a specific template containing the placeholder. Here’s a quic step-by-step:
- follow the steps 1, 2 and 3 described in the previous section
- Write your email in the box.
- Now you’ll need to select an email template that contains the placeholder {{customBody}} which you can previously create using the Email Builder. The text in the box will replace the placeholder.
- Send your email.
Send debtor sms
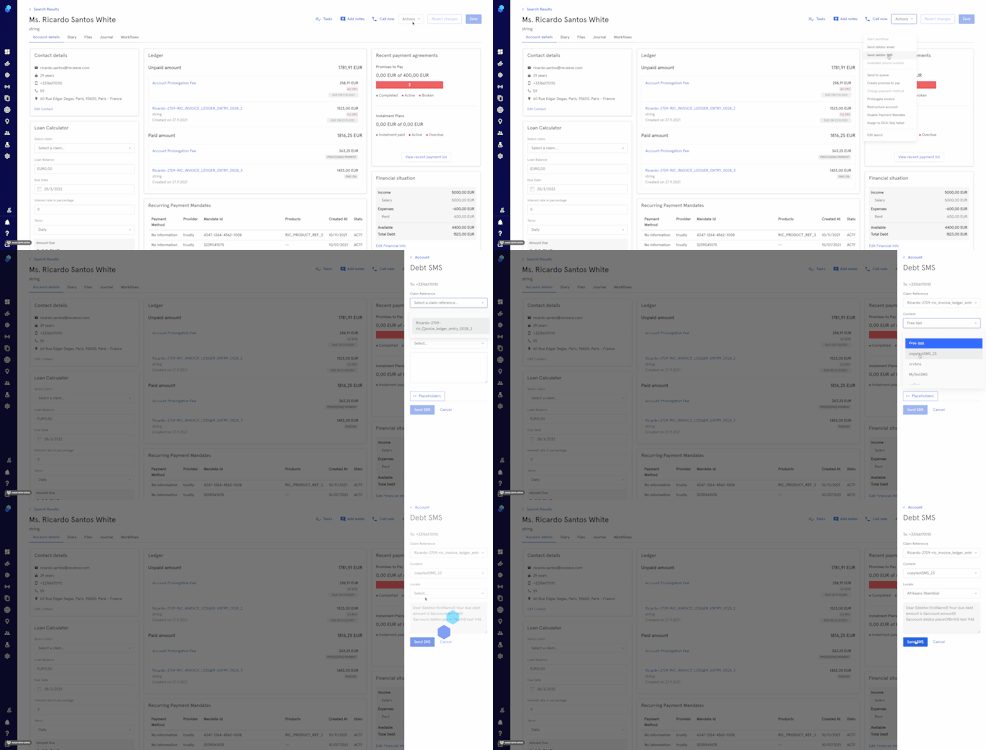
To send an sms to one of your customers, click on this action from the Actions dropdown. You can either send SMS that you have previously created or you can create your own SMS.
To send an SMS you've previously created:
- Select Claim reference
- Select Content
- Select Locale
- Click on Send SMS or Cancel to undo
To create a free text SMS:
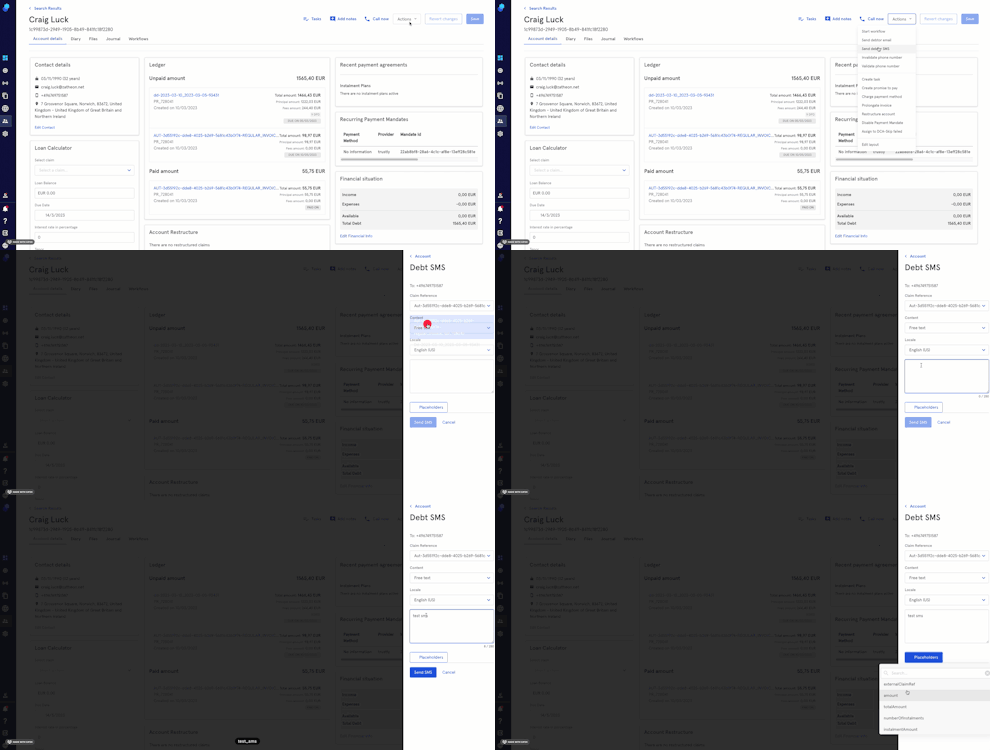
- Select Claim
- Select Free Text
- Select Locale
- Write your SMS
- Click 'Send' to proceed or 'Cancel' to undo
Click on the 'placeholders' button to see the placeholders list. Add them to your SMS if necessary
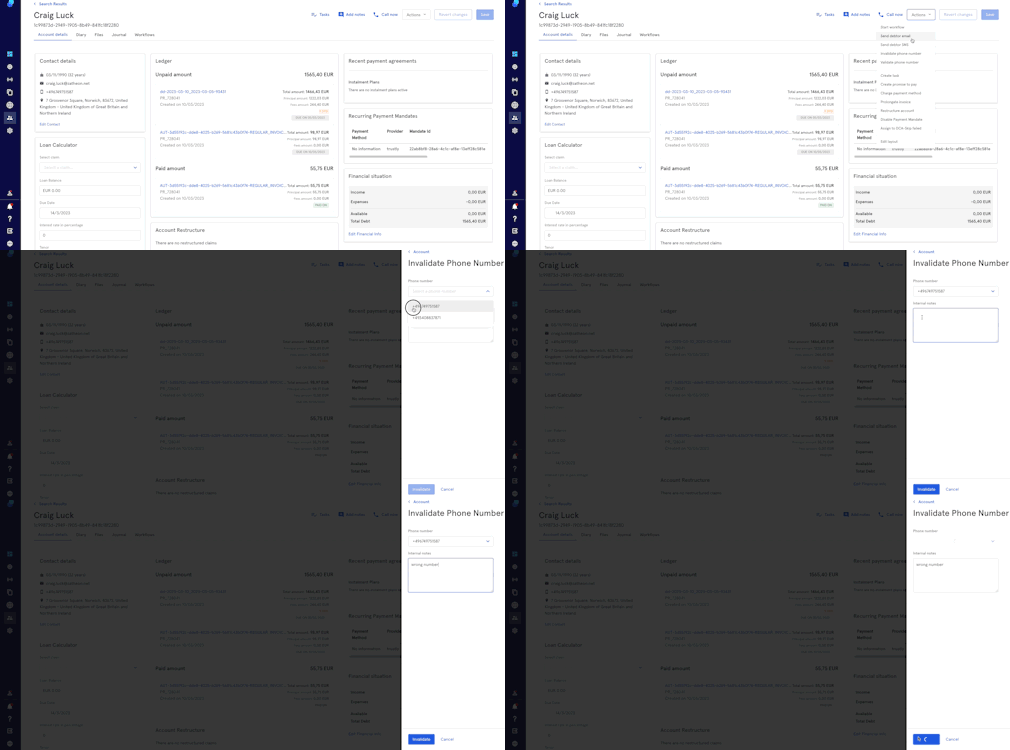
Invalidate phone number
- Click on the actions dropdown
- Select 'Invalidate phone number'
- Select the number you want to invalidate from the dropdown
- Add notes
- Click Invalidate to proceed or Cancel to undo.
Phone number
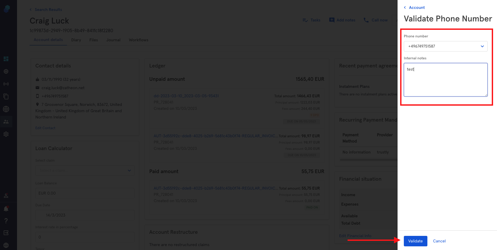
- Click on the actions dropdown
- Select 'Validate phone number'
- Select the number you want to validate from the dropdown
- Add notes (optional)
- Click Validate to proceed or Cancel to undo.
Create task
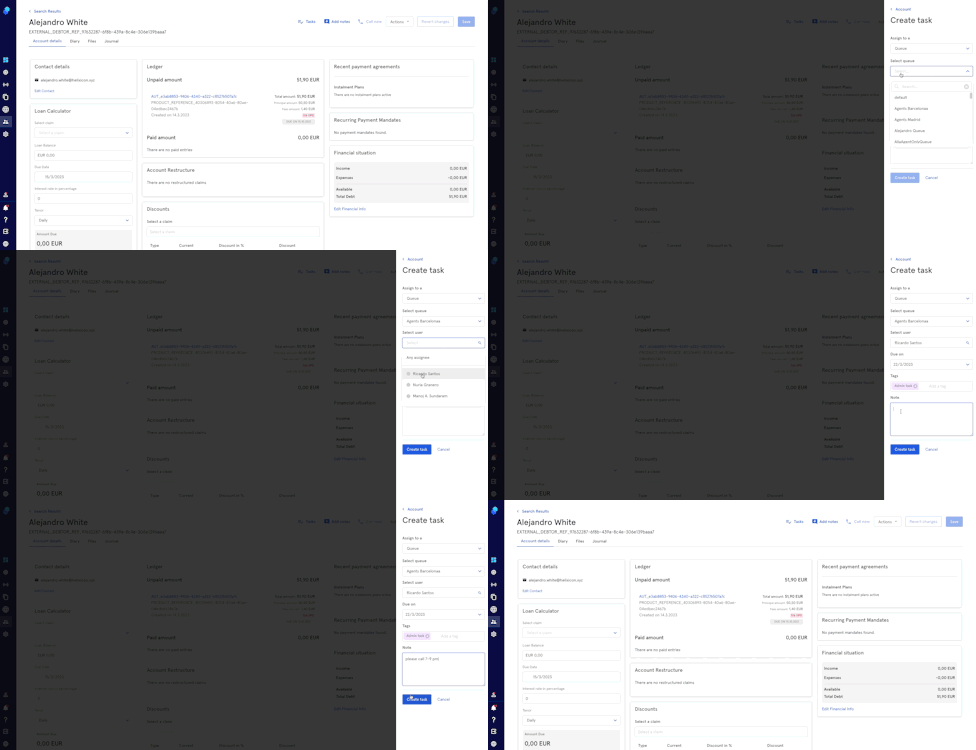
To create a task:
- Click on this action from the Actions dropdown.
- Assign to a Queue or Group
- If assigning to a Group, select group
- If assigning to a Queue, select queue and optionally, a user (agent)
- Select due date
- Add tags (optional)
- Add notes (optional)
- Click Create Task to proceed or Cancel
Create promise to pay
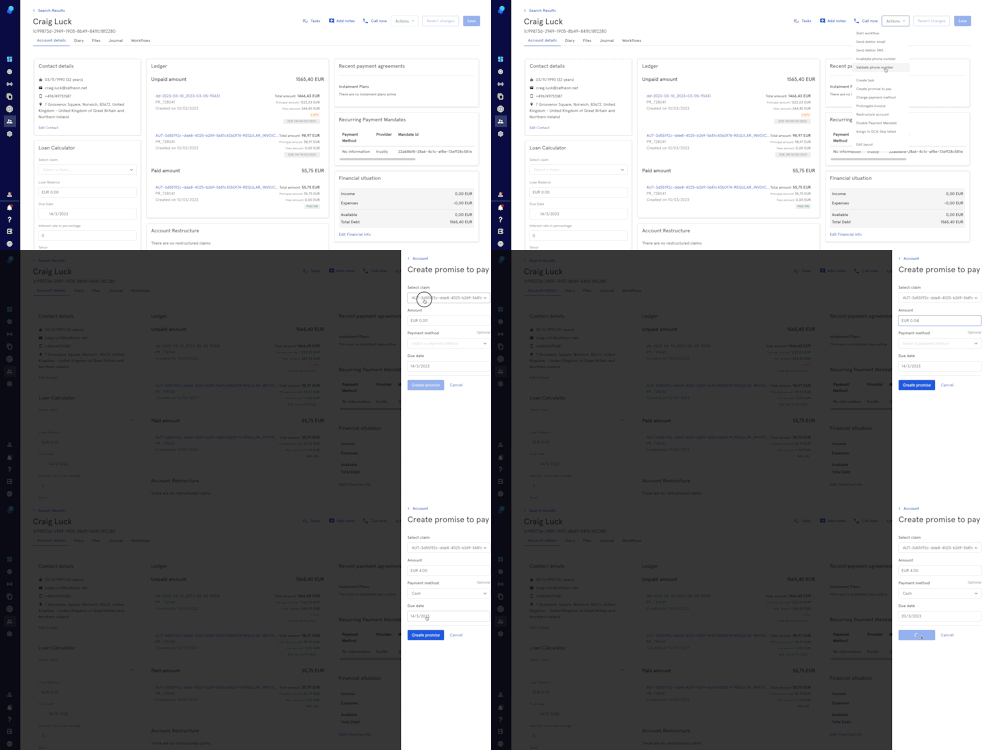
- Click on the Actions dropdown and select Promise to pay'
- Select a claim reference.
- Input the amount.
- Select Payment method (optional)
- Select the due date.
- Click Create
Charge payment method
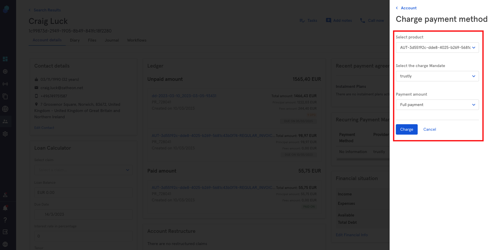
- To charge a payment method, click on this action from the Actions dropdown.
- Select the product you want to charge.
- Next, select the relevant payment method on charge mandate.
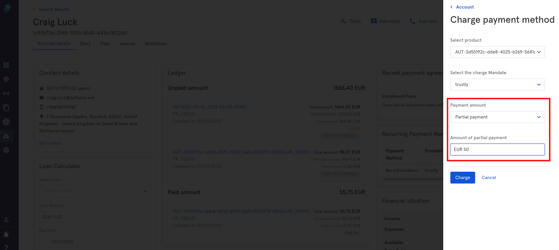
- You may choose between full or partial payment.
- For partial payments, please type the amount.
- Finally, click on charge to proceed or cancel to undo.
Prolongate invoice
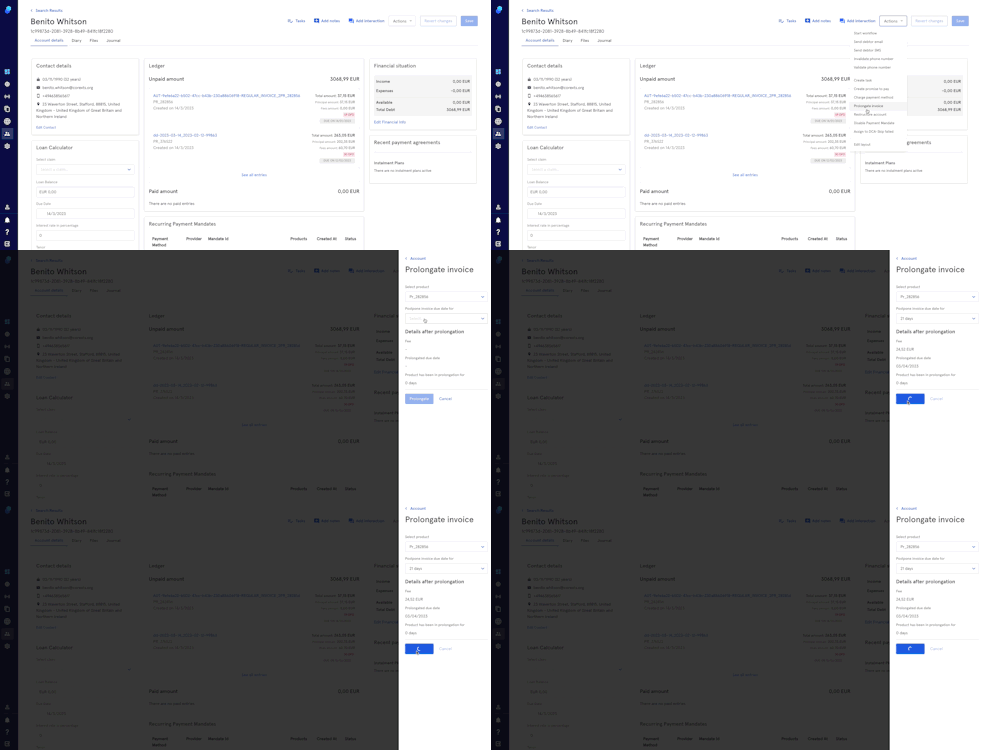
This action will allow you to prolongate an invoice for a specific number of days. A fee will apply and it will generate a new invoice.
- To prolong an invoice, click on this action from the Actions dropdown.
- Select the product (invoice) you want to prolong.
- Next select the prolongation period (7/14/21/30 days)
- In 'details after prolongation' you'll be able to see the fee, prolongated due date and the number of days this product has been in prolongation.
- Click on Prolongate to save the changes or click Cancel to undo.
Restructure account
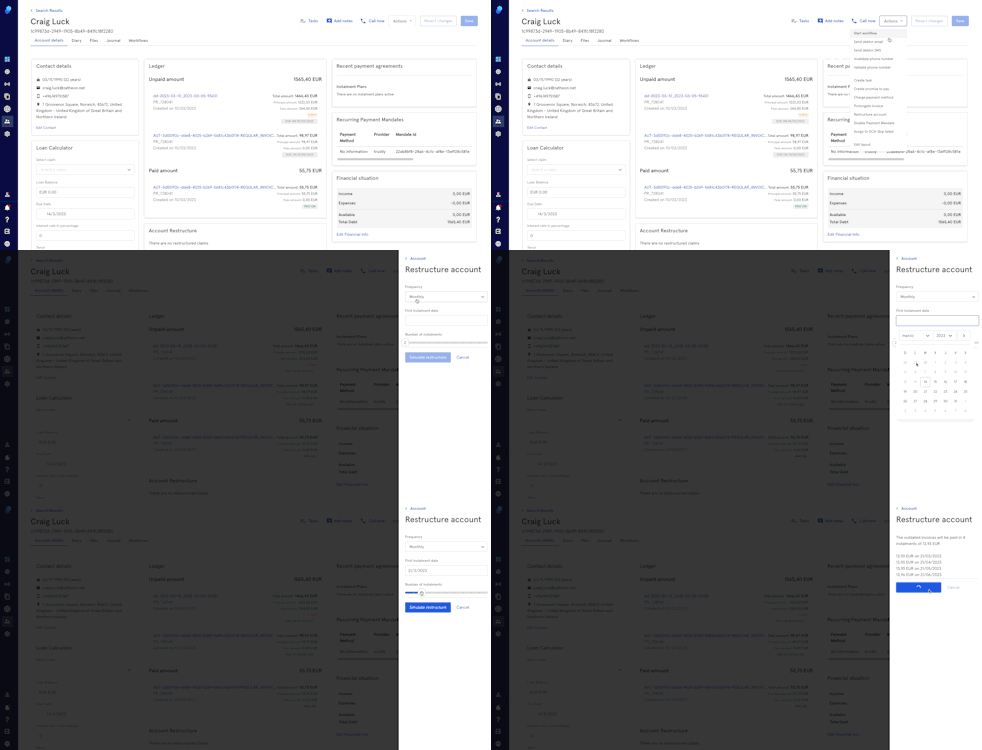
This action will restructure all the pending payments. All the claims are combined and converted into monthly or weekly installments.
- To restructure an account, click on this action from the Actions dropdown.
- Select the frequency.
- Select the date of the first installment.
- Select the number of installments.
- Next, click on Simulate Restructure to have an overview of the incoming payments and due dates.
- Click on Confirm Restructure or Cancel to undo.
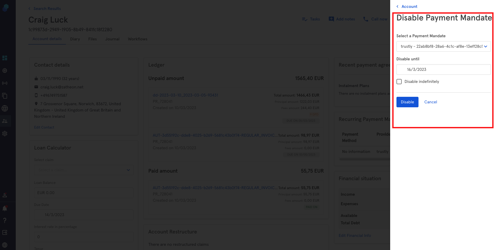
Disable Payment Mandate
To disable a Payment Mandate, click on this action from the Actions dropdown.
- Select the payment mandate you want to disable from the drop down list.
- Next select the date until which the payment mandate will be disabled.
- You can also click on the checkbox 'Disable indefinitely' if needed.
- Click on Disable to proceed or Cancel to undo.
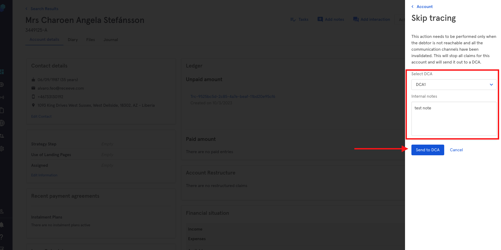
Assign to DCA - Skip failed
This action will individually assign an entire account to a partner DCA,
- To skip tracing, click on this action from the Actions dropdown.
- Next, select the DCA that will manage the account from the dropdown list.
- Add Notes (Optional)
- Click on Send to DCA to save the changes or Cancel to undo
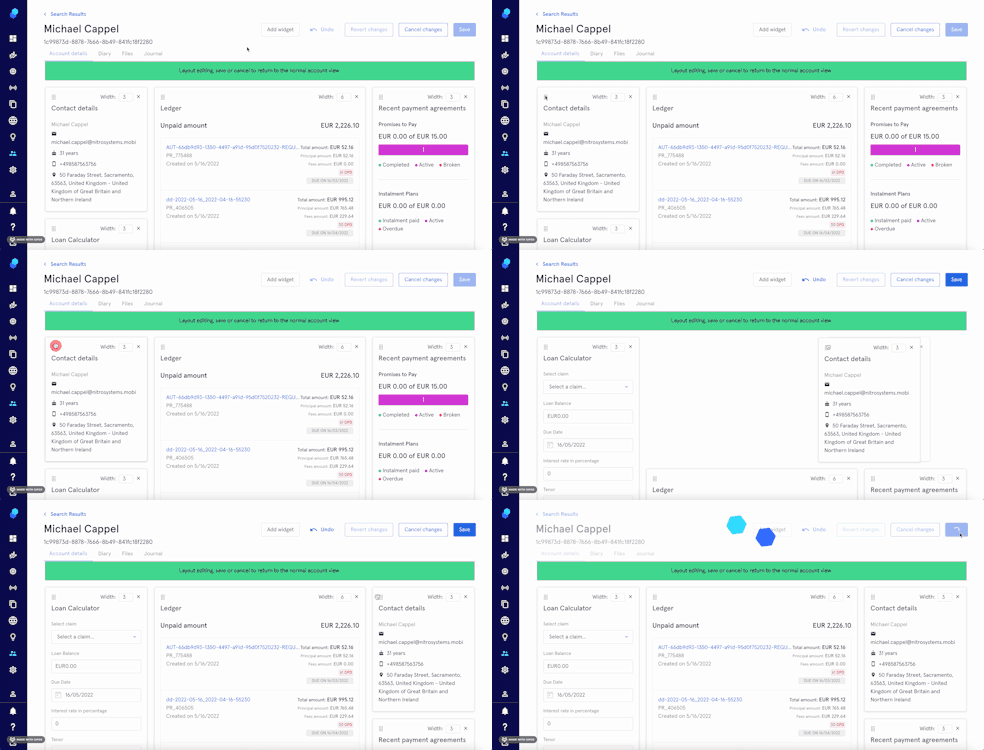
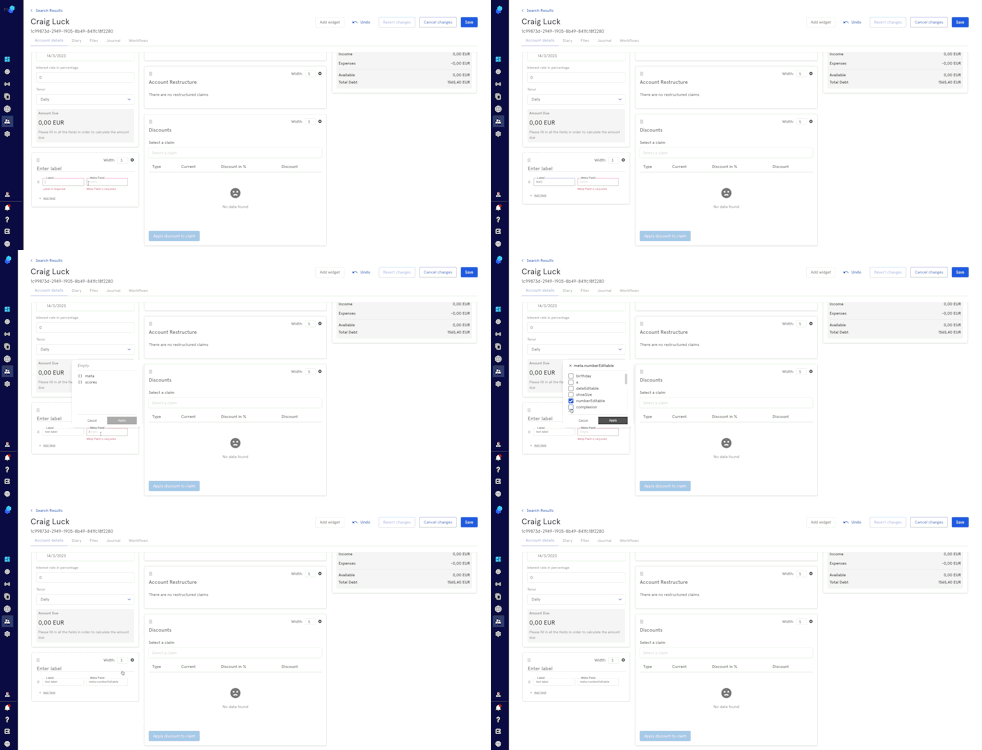
Edit Layout
You can edit the 'Account Details' layout
- First, click on the action Edit Layout.
- Next, press the dotted area to drag and drop the widget to a different position or
- Click on the Width dropdown to change the size of a widget
- Click on Save/Undo/Cancel Changes.
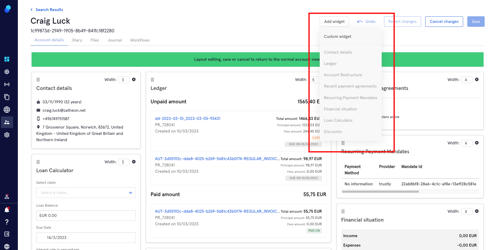
Adding new widgets
- Click on Edit layout
- Click on the Add widget button
- Choose between 'Custom' and 'Predefined' widgets
- Please note that if all the 'Predefined' widgets are on display, you won't be able to click on them.
Custom widgets
- Enter a label name.
- Click on Meta Field.
- Click on Meta
- Now choose the Meta Fields. Please note that you'll need to create metadata schemas in advance. For more information please check this article.
- Click on Apply or Cancel to undo
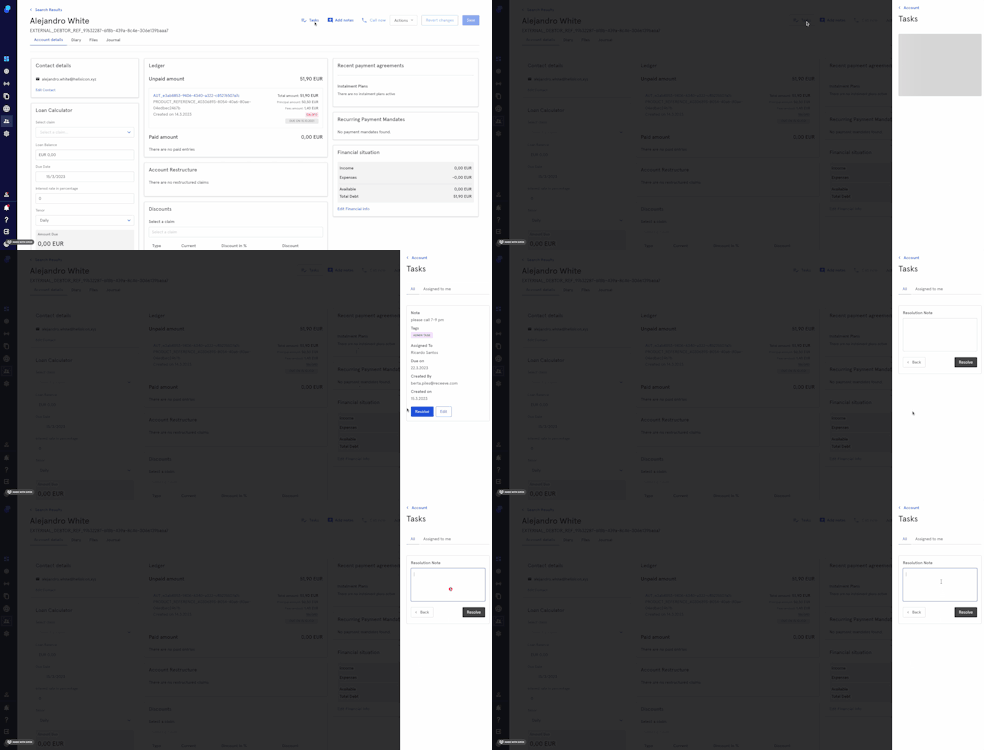
Tasks
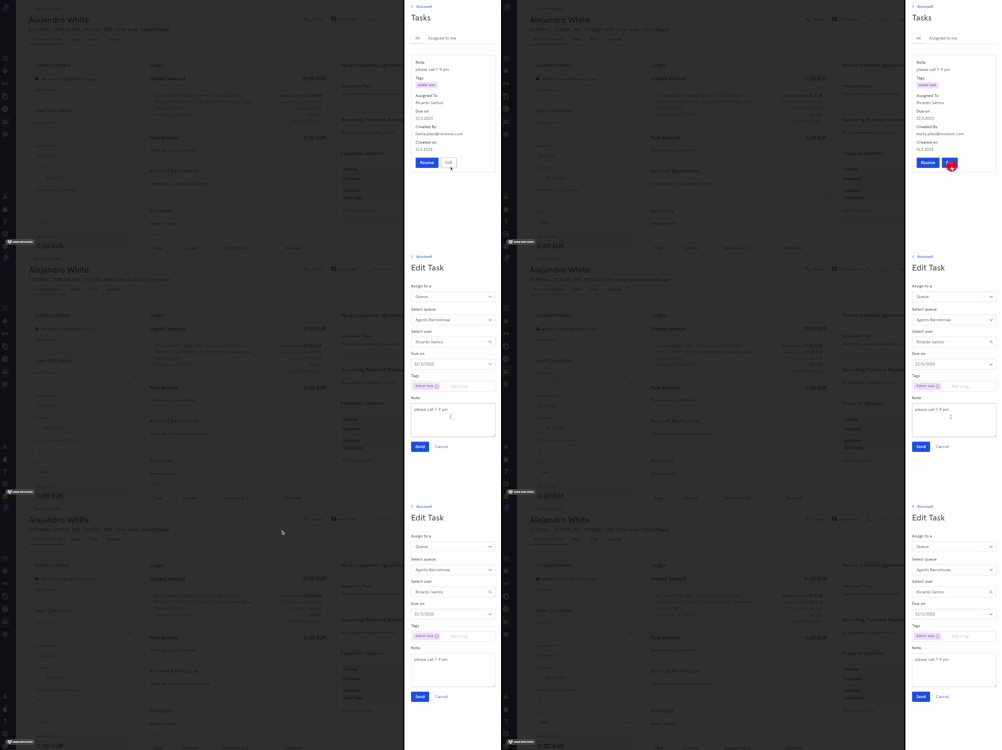
Click on the Tasks to view tasks associated with the account.
- Click Resolve to resolve the task and add a note (optional) or
- Edit to edit it.
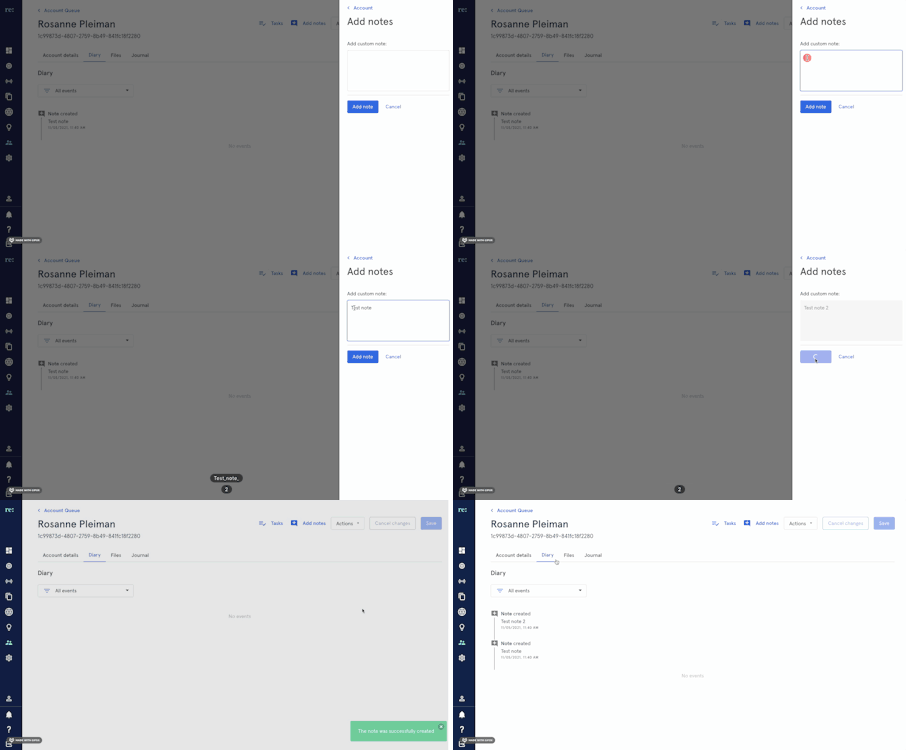
Add notes
- Click on the Add notesbutton
- Add note
- Click on Add Note to proceed or Cancel to undo
- The notes will be displayed in the Diary tab.
Add Interaction
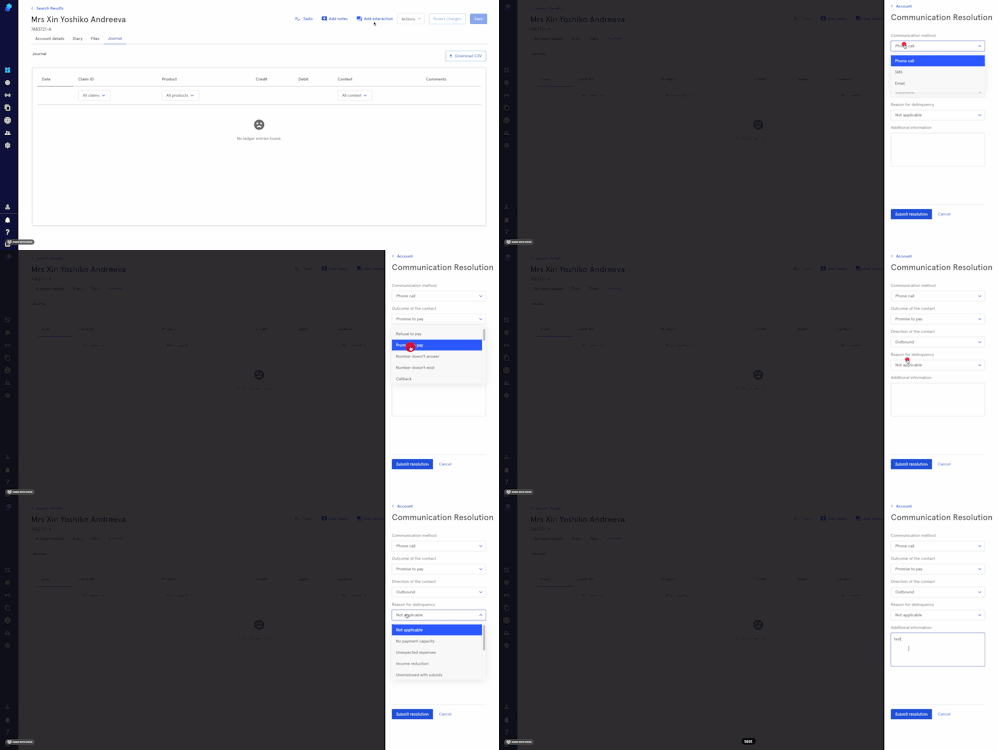
To add an interaction click on the Add interaction button (top right)
- Choose Communication method
- Choose Outcome
- Choose Direction of the Contact
- Choose reason for delinquency
- Add additional information (Optional)
- Click on Submit resolution to proceed or Cancel to cancel.
Contact details
The Contact details widget lists every customer on the account, with their email addresses, phone numbers and postal address. Click Edit contact at the bottom of the widget to change them.
Alongside those, you can record when each customer may be contacted. Both fields are optional, and a customer who has neither is contacted according to the hours configured for your client.
Timezone
The timezone the contact hours below are read in, so a window of 09:00 to 17:00 means 09:00 to 17:00 where the customer is, not where you are. Search for the timezone and select it from the dropdown. When it is left empty, your client's own configured timezone is used instead.
Contact hours
Click Set contact hours (or the summary, if hours are already set) to open the editor. Each day of the week can be in one of three states:
- Left untouched — your client's configured hours apply to that day. This is how every day starts.
- Do not contact — tick the checkbox and the customer is never contacted on that day.
- One or more windows — click Set hours for this day, then adjust the start and end times. Click Add hours to add a second window.
A day can hold more than one window, which is how you leave a gap in the middle of the day: 09:00 to 12:00 and 13:00 to 17:00 means the customer is not contacted over lunch, whereas a single window of 09:00 to 17:00 means they can be.
Two rules the editor enforces, so you will see a message rather than an invalid value being saved:
- every window needs both a start and an end, and the end must be later than the start
- windows on the same day cannot overlap, and a window cannot run past midnight into the next day — to describe an overnight period, set hours on both days
Once you are happy, click Continue to close the editor and then Save at the top of the page. Nothing is stored until you save.
Contact hours can also be sent through the API or a file import, so if your system already knows when a customer prefers to be contacted, they do not have to be entered here.
2. Diary
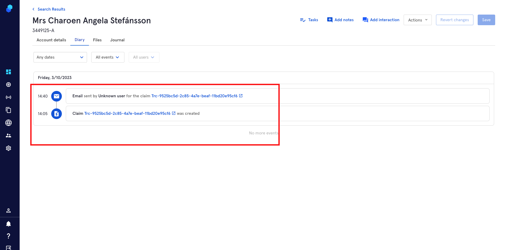
The Diary tab provides us with an overview of past activities associated to the Account we're checking.
Please note that the events displayed include both automatically and manually triggered events.
Filters
You'll be able to filter by:
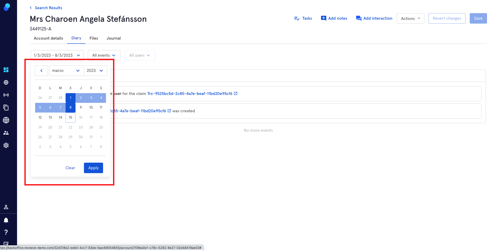
Date
- Click on the dropdown
- Choose your day or
- To select a specific time period, click on its first and last day
- Chose Apply to proceed or Clear to undo
Event
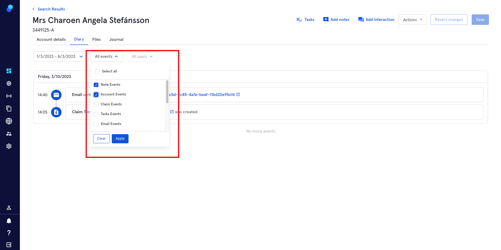
- Choose an event or events from the dropdown or
- Select all
- Chose Apply to proceed or Clear to undo
Users
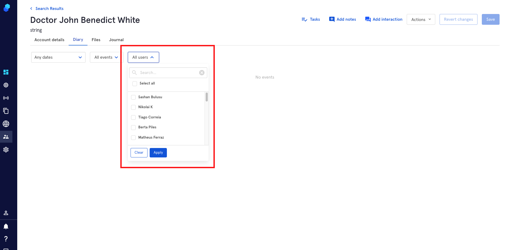
- Choose users from the dropdown or
- Select all
- Chose Apply to proceed or Clear to undo
The Events are displayed in chronological order and grouped by days. You'll find important information such as a direct hyperlink to the respective Email or Claim (if applicable, depending on the events selected)
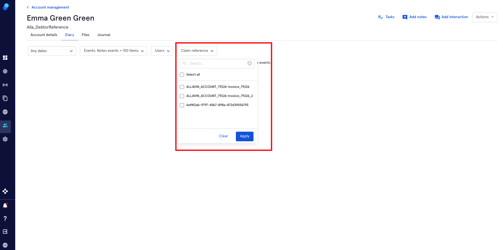
Claim Reference
- Choose claim reference/claim references from the dropdown or
- Select all
- Chose Apply to proceed or Clear to undo
3. Files
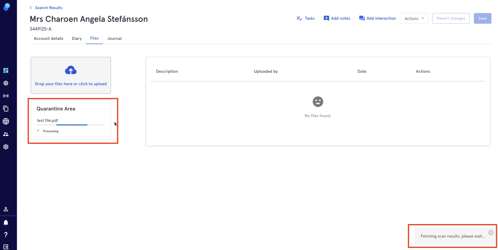
Upload files associated to a specific account from this tab.
You can:
- Drop your files or
- Click to upload
- Files will go to the quarantine area first and once the system scans them they'll appear on the right side of your screen. If the system considers the file to be a potential security risk it will remain in the Quarantine Area.
4. Journal
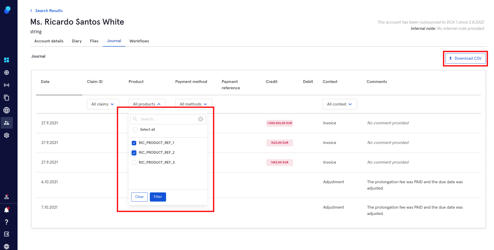
The journal tab shows all the entries made to the ledger.
You can sort by product, Claim ID, Date and Context:
- Select Claim/Product/Payment Method/Context or
- Select all
- Click filter to proceed or Clear to undo your selection
You can download a CSV file with all the entries made to the ledger by clicking on the Download CSV button on the top right.